Dance photography session Part 1: The headshots
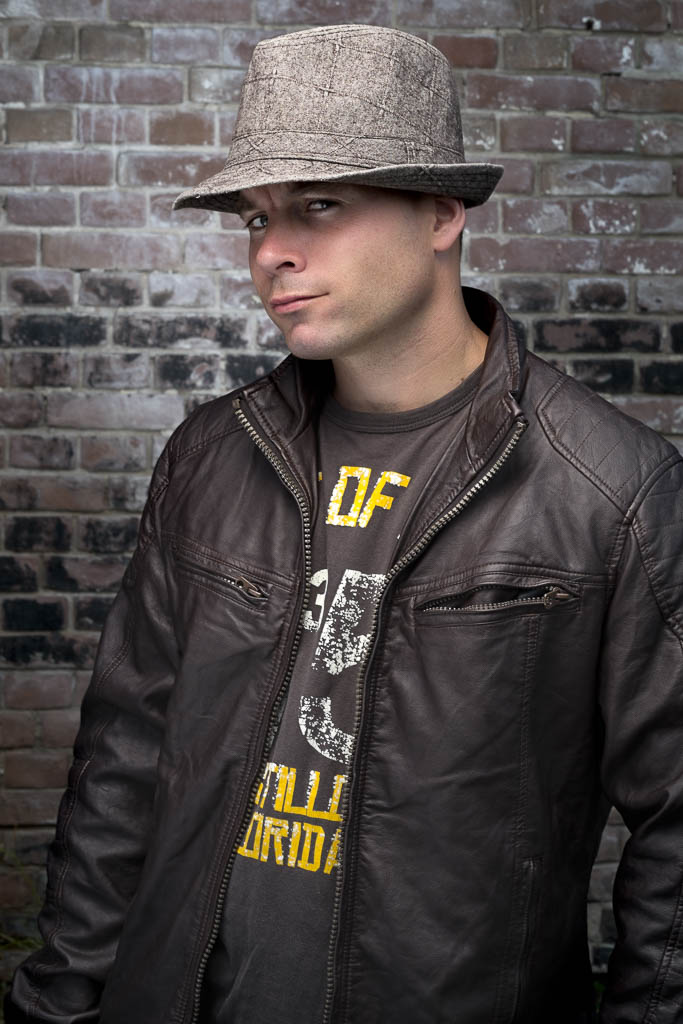
In the upcoming blogs I am going to take you through the process of a dance photography shoot. A few weeks a go I got the call from Djenz Factor that they needed new promotional photo's for their new website. Having worked with them multiple times before I knew this was going to be fun! For location we have been to the area of the Lichtfabriek in Haarlem. Because that is where the new dance studio is going to be. We wanted to start with an outside session. It is in an old industrial area so it is really nice. The only thing that was looking to be a problem was the weather, but it was great weather that evening! We started with the head shots of the creative team
The Set up
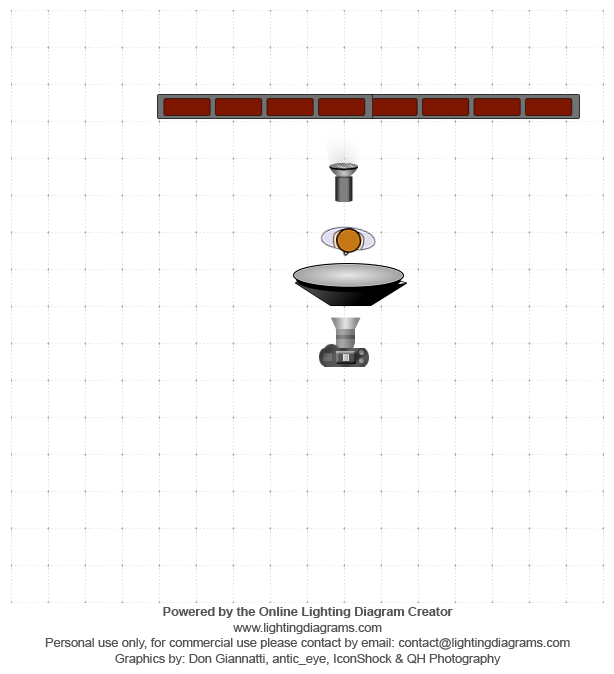
For the Headshots I used a fairly basic setup. On the location we found this lovely brick wall to use as a background. For the lighting I used my Elinchrom Quadra set with A heads. The main light was in the A port with the 100 Rotalux octa soft box. I Also placed a second light on the background, that was in the B port with the Elinchrom 18cm reflector and grid, so it had a little bit of a natural vignette. To have a little bit of fill I used a silver reflector handheld by my assistant. For camera I was using the Fuji X-pro1 with the Fuji 56mm 1.2 lens. I was really happy to use it for the first time on a job. Setting were: raw+jpeg fine, F10, 1/125 ISO 100.
Going to Post
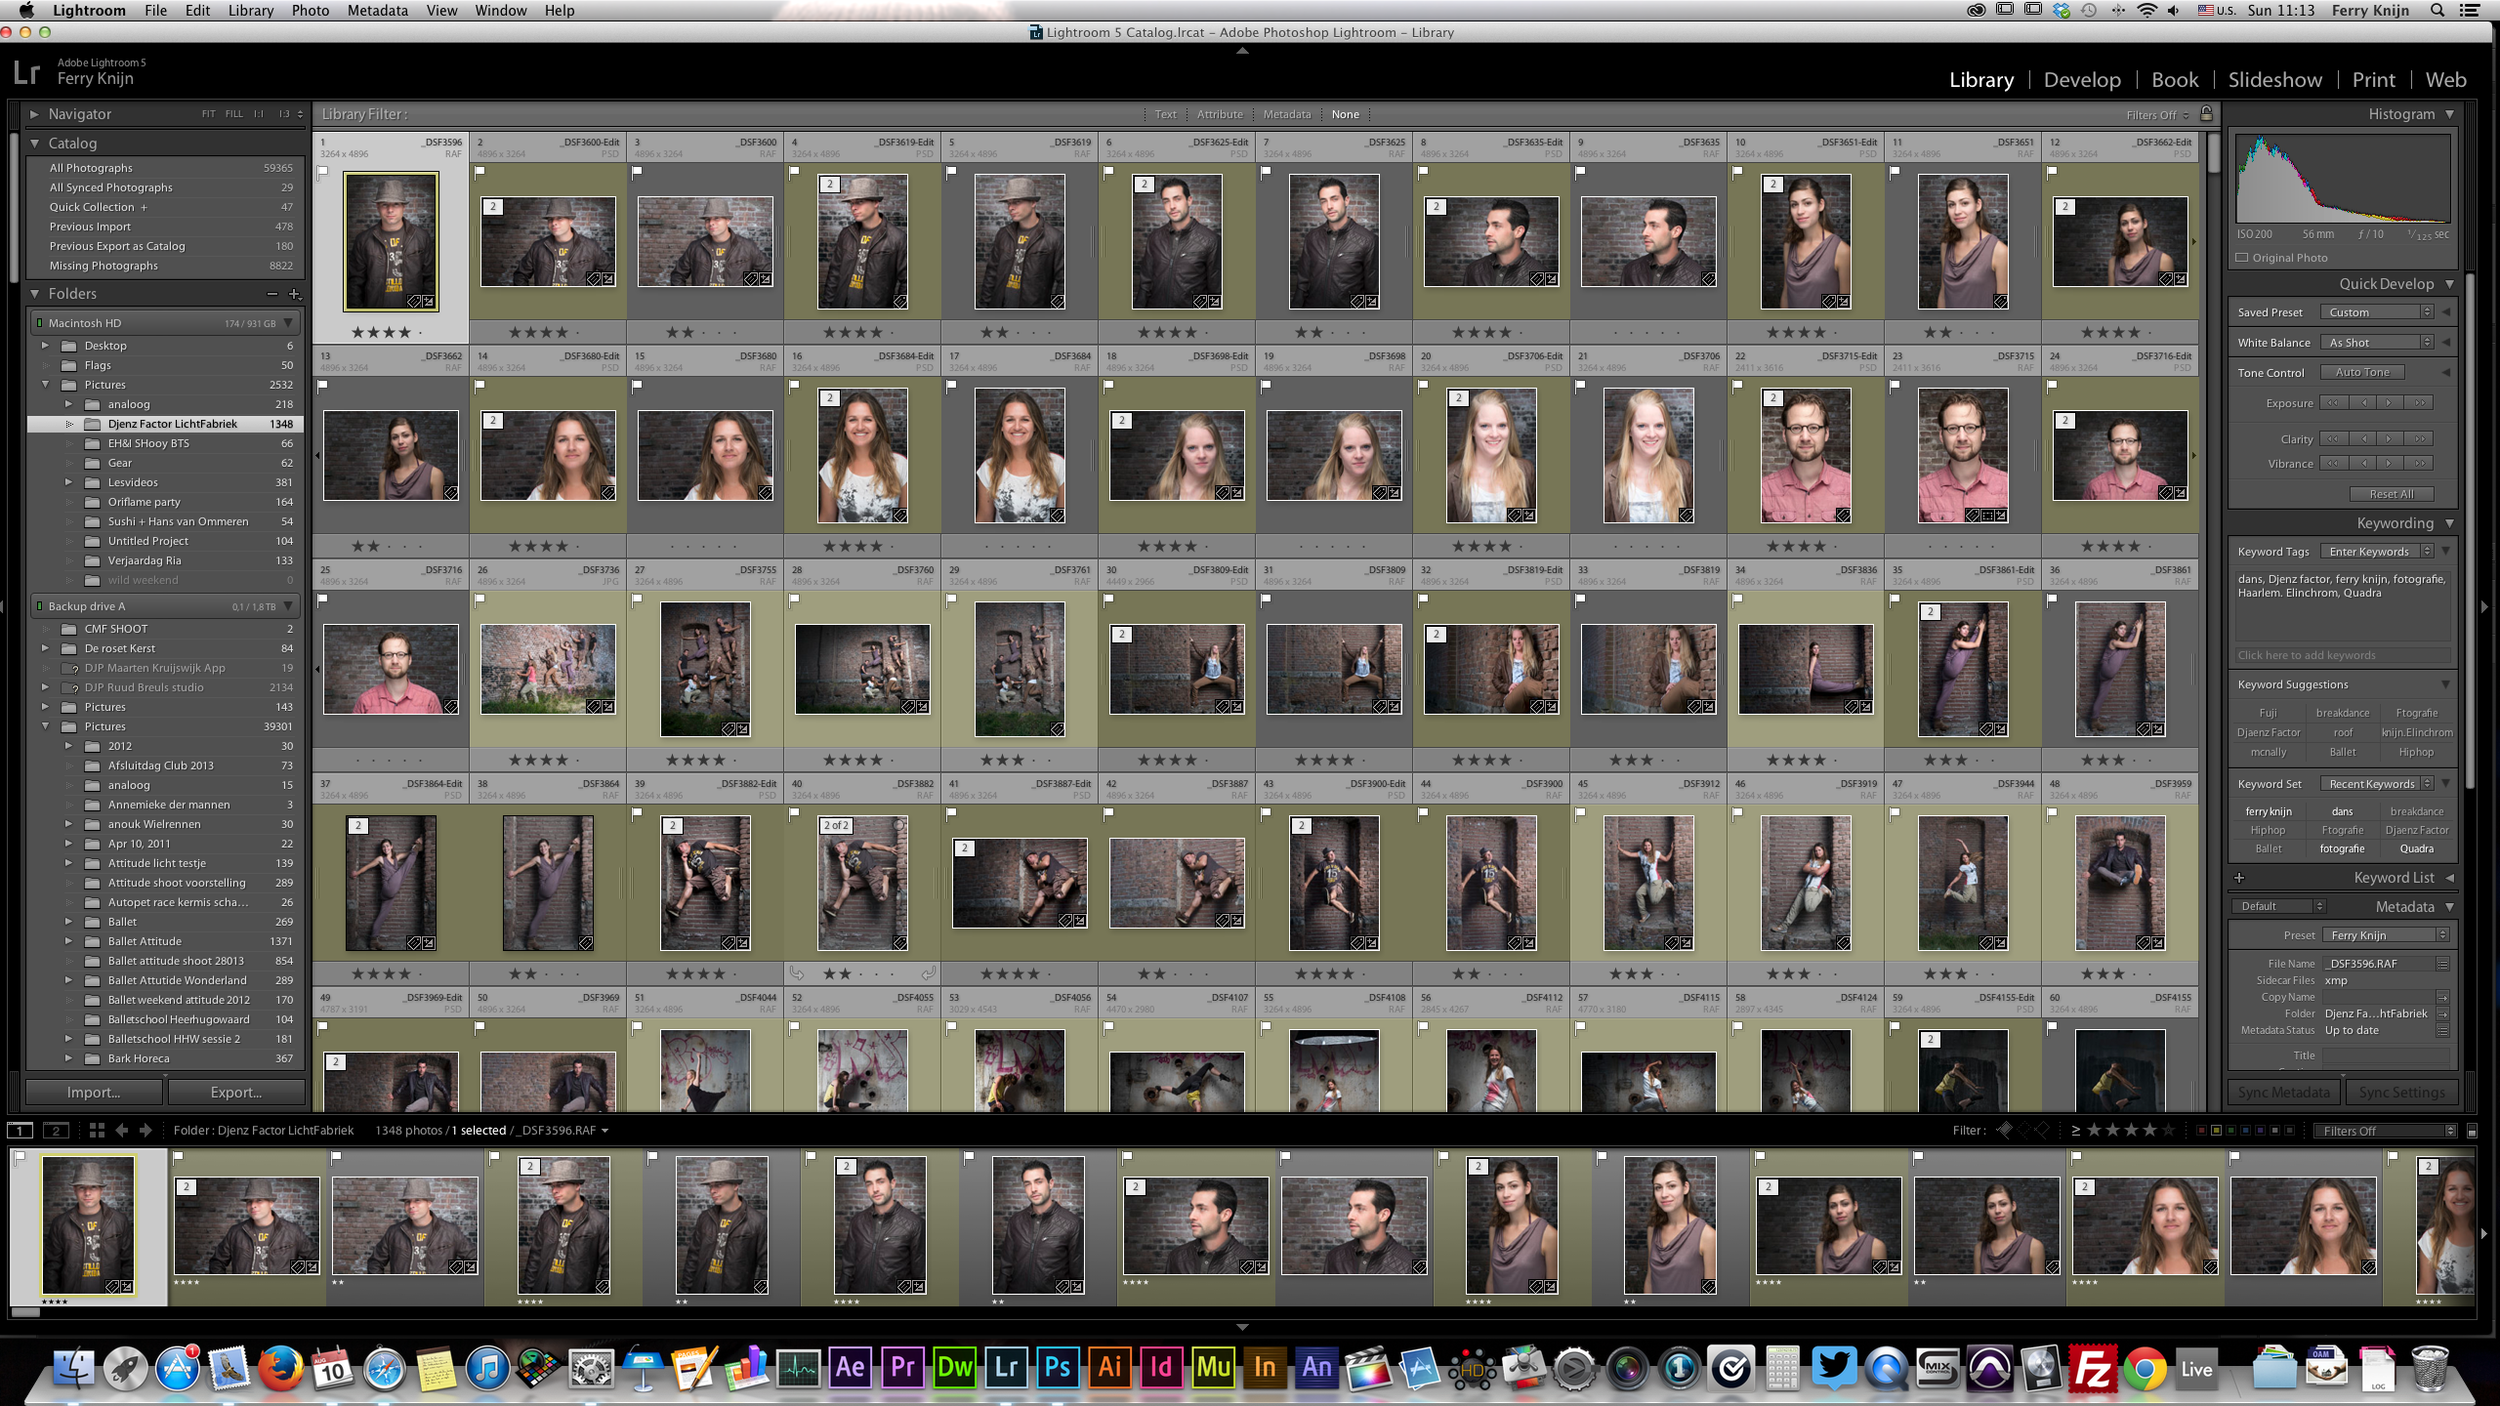
When I first opened the files in Lightroom I was really impressed by the jpegs of the camera. They where so good that I even have delivered some pure jpeg's to my clients. I also noticed that the Lightroom Fuji profiles are still of and not matching enough for my taste. For post I really have speeded up my workflow. In the past I was using Nik Color Efex pro a lot, but the loading time was getting to long for me. When I just have to do a few pictures it is no problem, but when you have to do around 50, it is too long. So I have started to create some actions to speed everything up.
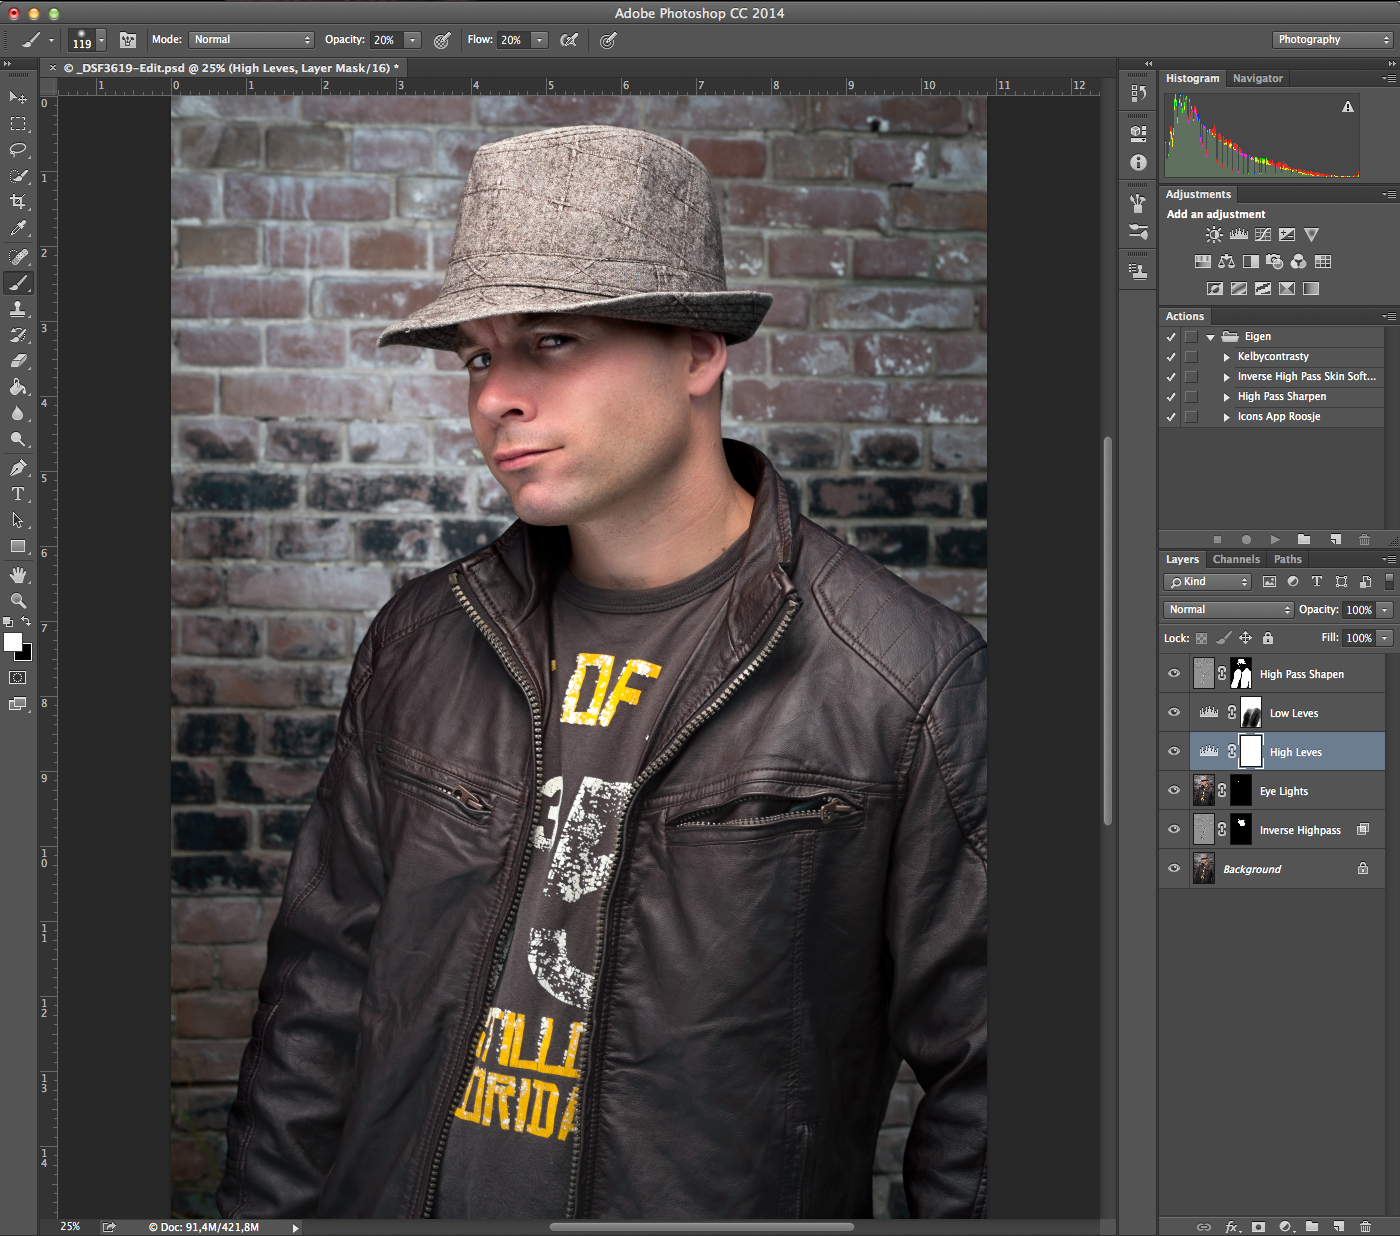
I first started to remove some of the basic blemishes with the healing brush. After that I used the Inverse High pass skin softening action. Which is based on a technique I learned from Scott Kelby on KelbyOne. It gives a nice skin in just a few seconds. After the skin was done I wanted to make the eyes pop a little more. So I created another layer, set it to screen and hidden it with a layer mask. Than used a brush to reveal it on the eyes and used the opacity to make it look more natural. To add a little more contrast I made two level adjustments and painted them in the Layer masks. To finish it off used the High Pass filter to give it a little more sharpness on some areas.
Done
And that was all I did. If you have any questions post a reaction down below!


