
Creëer andere achtergrond in Photoshop
In de video die ik voor de Fujifilm #Staycreativeathome voedselfotografie challenge gemaakt heb liet ik zien dat je simpel de achtergrond kan veranderen als het op egale achtergrond gefotografeerd is. Echter was dat erg snel uitgelegd, dus heb ik onderstaande video gemaakt waarin ik dit iets beter uitleg hoe je dit met basis photoshop vaardigheden kan doen.
Monday, Blogday: the Box Office
The holidays are over so Monday, Blogday is back! Today with the edit of the Box Office. I got inspired by some work of Brooke Shaden and with the upcoming Fantasy Studio photography next sunday I wanted to do some extra practicing!
So here it is the Box Office! Below is the video of the Photoshop edit!

Dance photography session Part 1: The headshots
In the upcoming blogs I am going to take you through the process of a dance photography shoot. A few weeks a go I got the call from Djenz Factor that they needed new promotional photo's for their new website. Having worked with them multiple times before I knew this was going to be fun! For location we have been to the area of the Lichtfabriek in Haarlem. Because that is where the new dance studio is going to be. We wanted to start with an outside session. It is in an old industrial area so it is really nice. The only thing that was looking to be a problem was the weather, but it was great weather that evening! We started with the head shots of the creative team
The Set up

For the Headshots I used a fairly basic setup. On the location we found this lovely brick wall to use as a background. For the lighting I used my Elinchrom Quadra set with A heads. The main light was in the A port with the 100 Rotalux octa soft box. I Also placed a second light on the background, that was in the B port with the Elinchrom 18cm reflector and grid, so it had a little bit of a natural vignette. To have a little bit of fill I used a silver reflector handheld by my assistant. For camera I was using the Fuji X-pro1 with the Fuji 56mm 1.2 lens. I was really happy to use it for the first time on a job. Setting were: raw+jpeg fine, F10, 1/125 ISO 100.
Going to Post
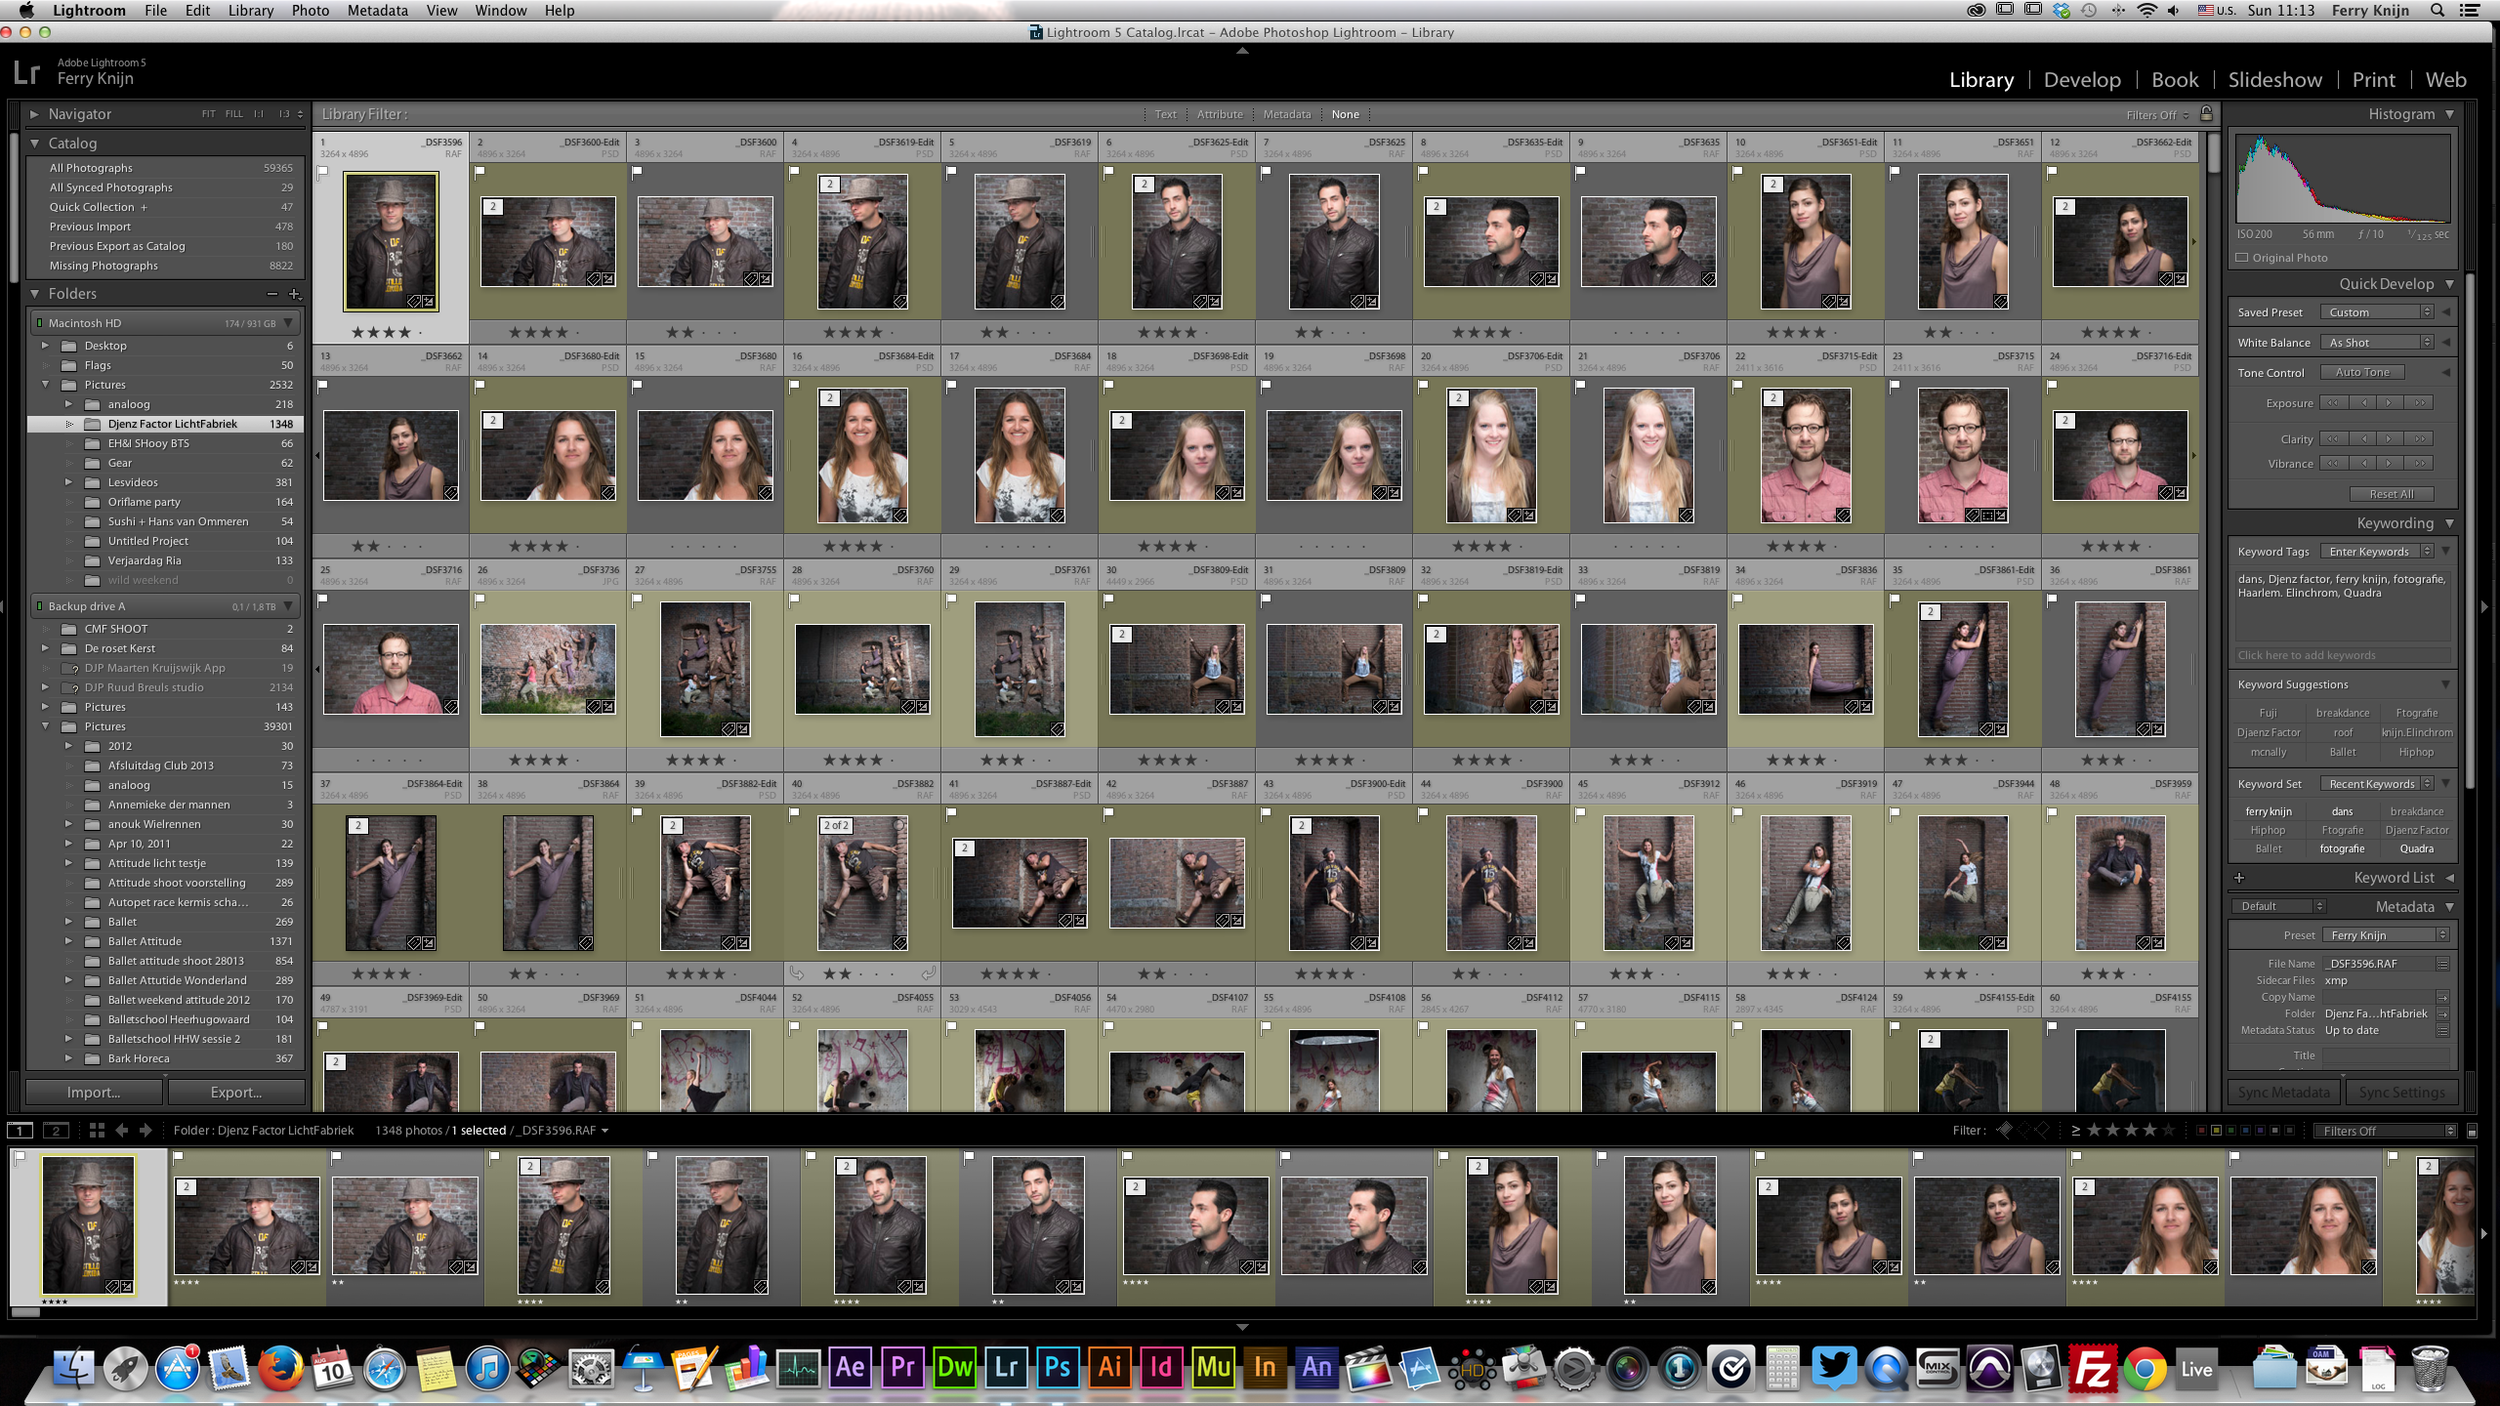
When I first opened the files in Lightroom I was really impressed by the jpegs of the camera. They where so good that I even have delivered some pure jpeg's to my clients. I also noticed that the Lightroom Fuji profiles are still of and not matching enough for my taste. For post I really have speeded up my workflow. In the past I was using Nik Color Efex pro a lot, but the loading time was getting to long for me. When I just have to do a few pictures it is no problem, but when you have to do around 50, it is too long. So I have started to create some actions to speed everything up.
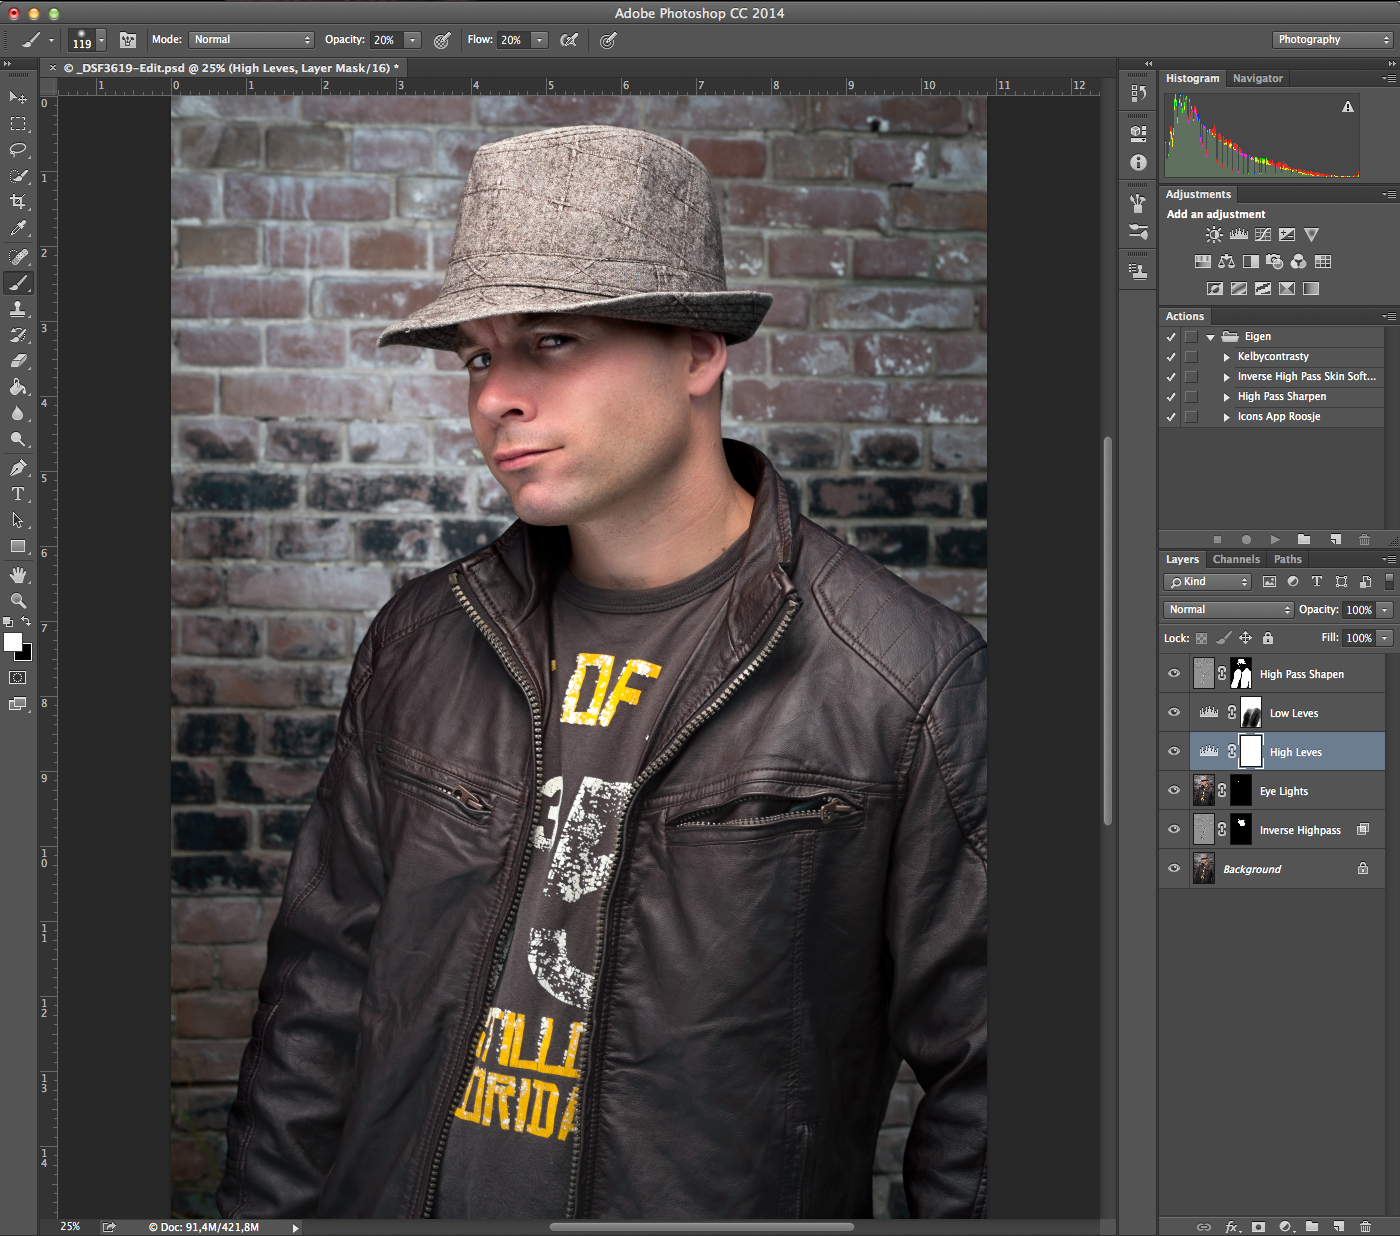
I first started to remove some of the basic blemishes with the healing brush. After that I used the Inverse High pass skin softening action. Which is based on a technique I learned from Scott Kelby on KelbyOne. It gives a nice skin in just a few seconds. After the skin was done I wanted to make the eyes pop a little more. So I created another layer, set it to screen and hidden it with a layer mask. Than used a brush to reveal it on the eyes and used the opacity to make it look more natural. To add a little more contrast I made two level adjustments and painted them in the Layer masks. To finish it off used the High Pass filter to give it a little more sharpness on some areas.
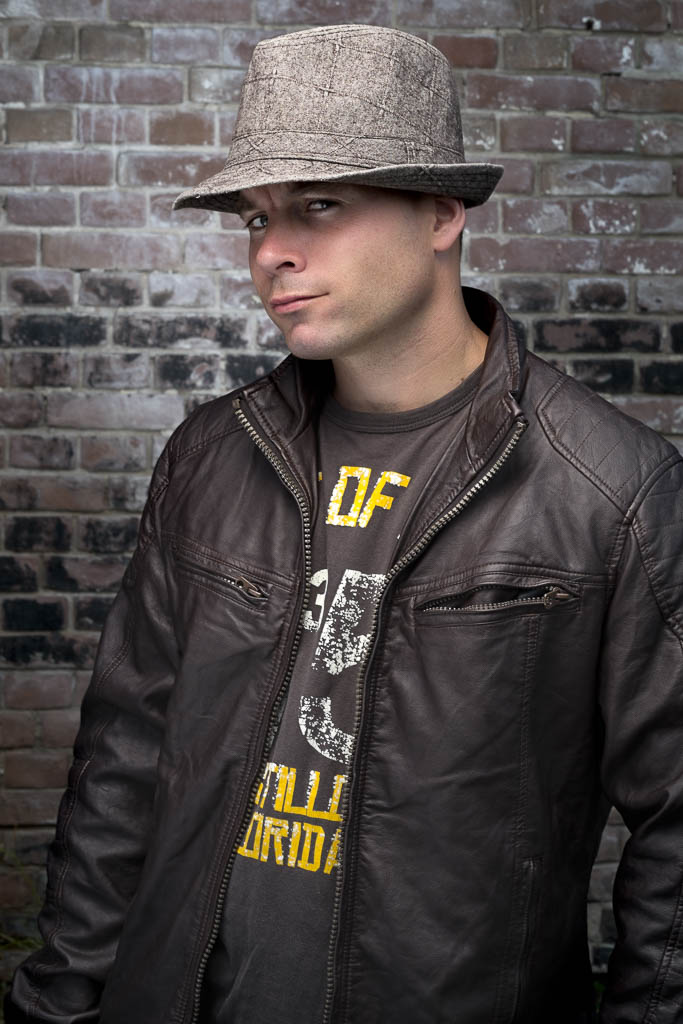
Done
And that was all I did. If you have any questions post a reaction down below!
Time worker: How it's made
Vandaag wil ik jullie laten zien hoe ik de Time worker gemaakt heb. Het kostuum heeft het model zelf samengesteld en gebruikt zij bij role playing en fairs. Ik had haar via via op internet gevonden en het leek me leuk hier iets mee te doen.
De belichting

Een goede basisfoto is het belangrijkste wat er is. Het bouwen van de juiste belichting was even zoeken, maar de volgende opstelling heb ik gebruikt:
1. Dit is een Elinchrom BRX250 met een Elinchrom Rotalux 35x90 strip softbox. Dit was de fill die ik gebruikte omdat de grid te weinig van het kostuum belichte. 2. Dit is een Elinchrom RX One met een Elinchrom 18 cm refelector met grid. Dit was de lamp waar mee ik begon. Hij is zo gericht dat je ook goed het kompas kunt zien. 3. Om de lantaarn het effect te geven alsof deze ook echt licht geeft, heb ik een YoungNuo YN-560II flitser gebruikt in slave mode met een Honel ¼' grid.
Nabewerking
Ik ben geen grote fan van al te veel Photoshoppen en nabewerking, met een foto als dit heb je het "gevaar" snel over de top te gaan en dat wilde ik juist niet. Ik wil altijd dat het nog een beetje een echte feel blijft houden.
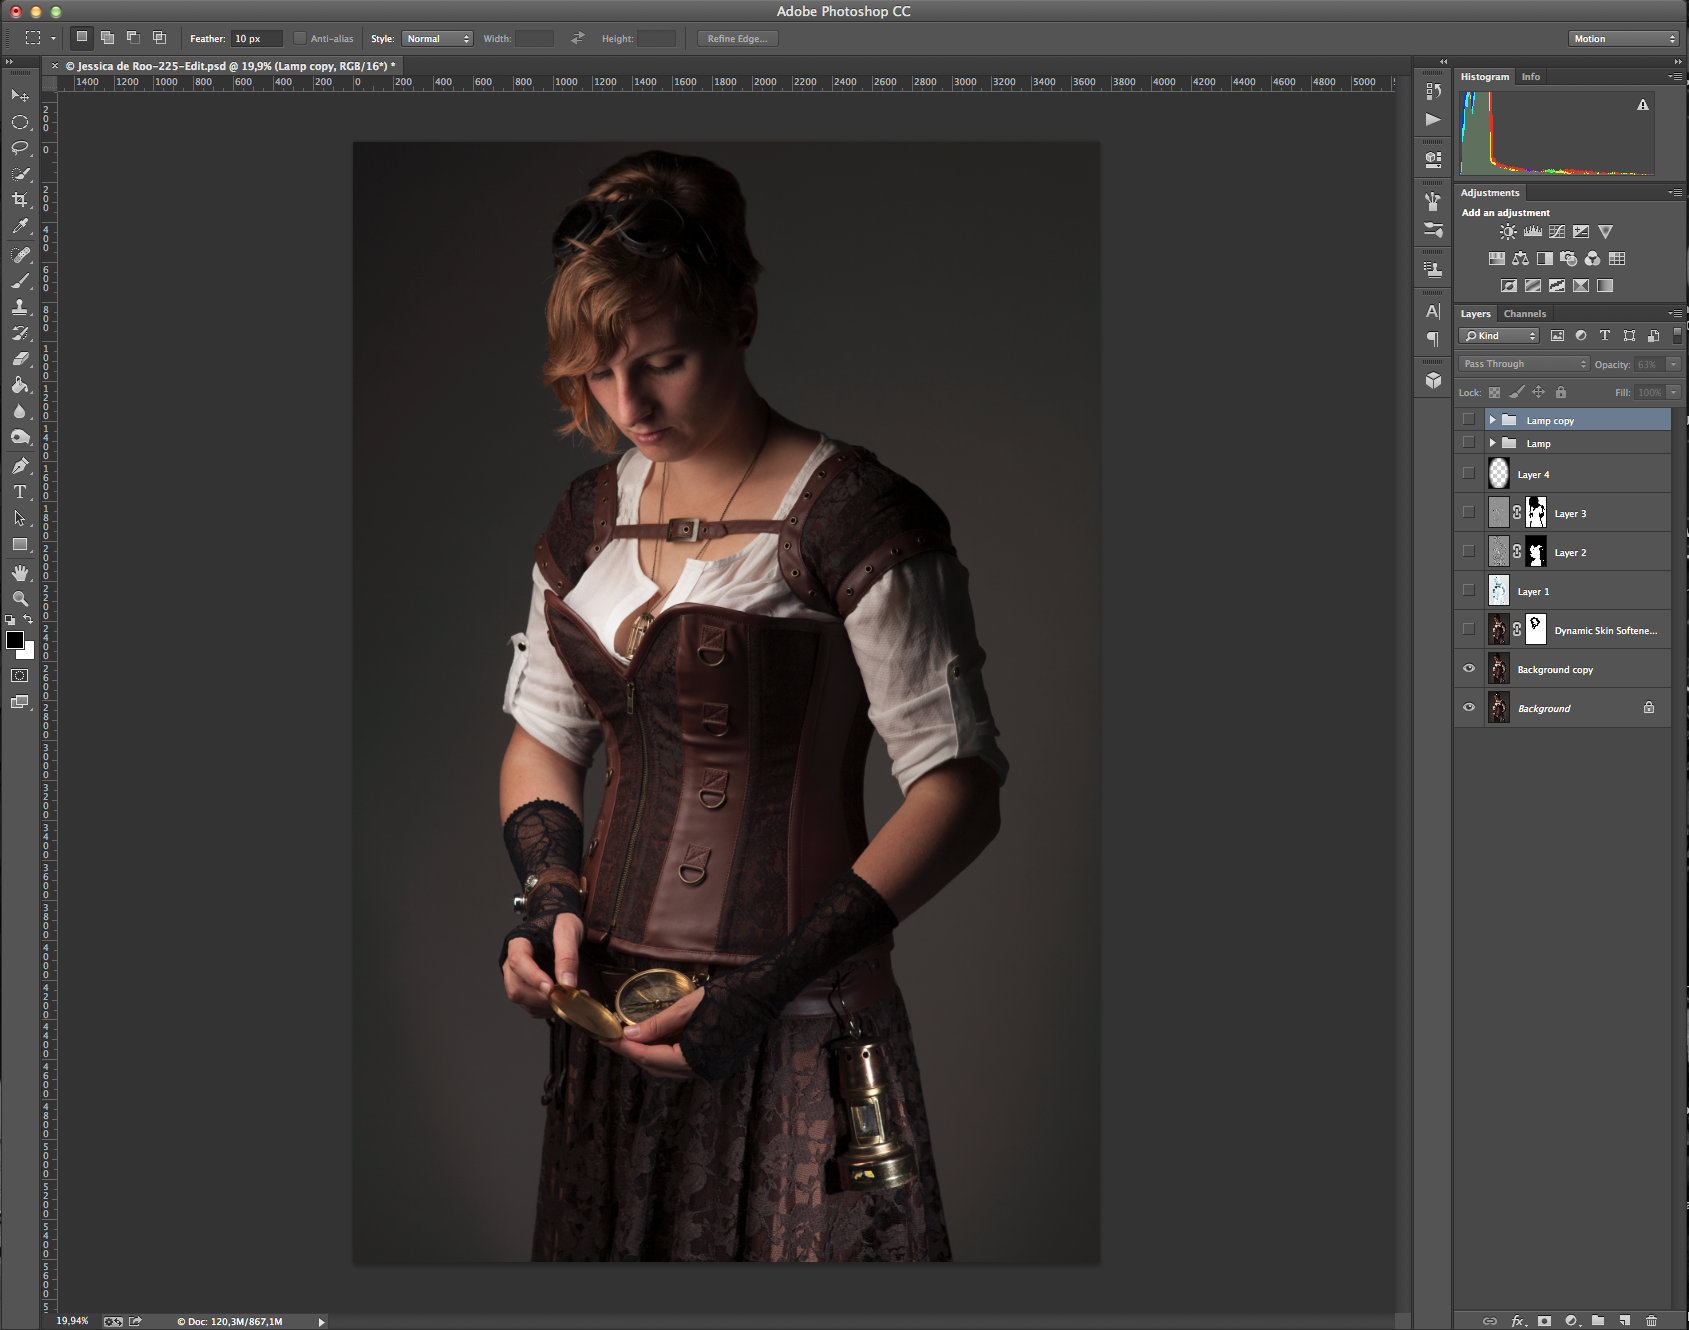
Stap 1: De basis foto heb ik eerst gekopieerd en de meeste vlekjes en dergelijk weg gehaald.
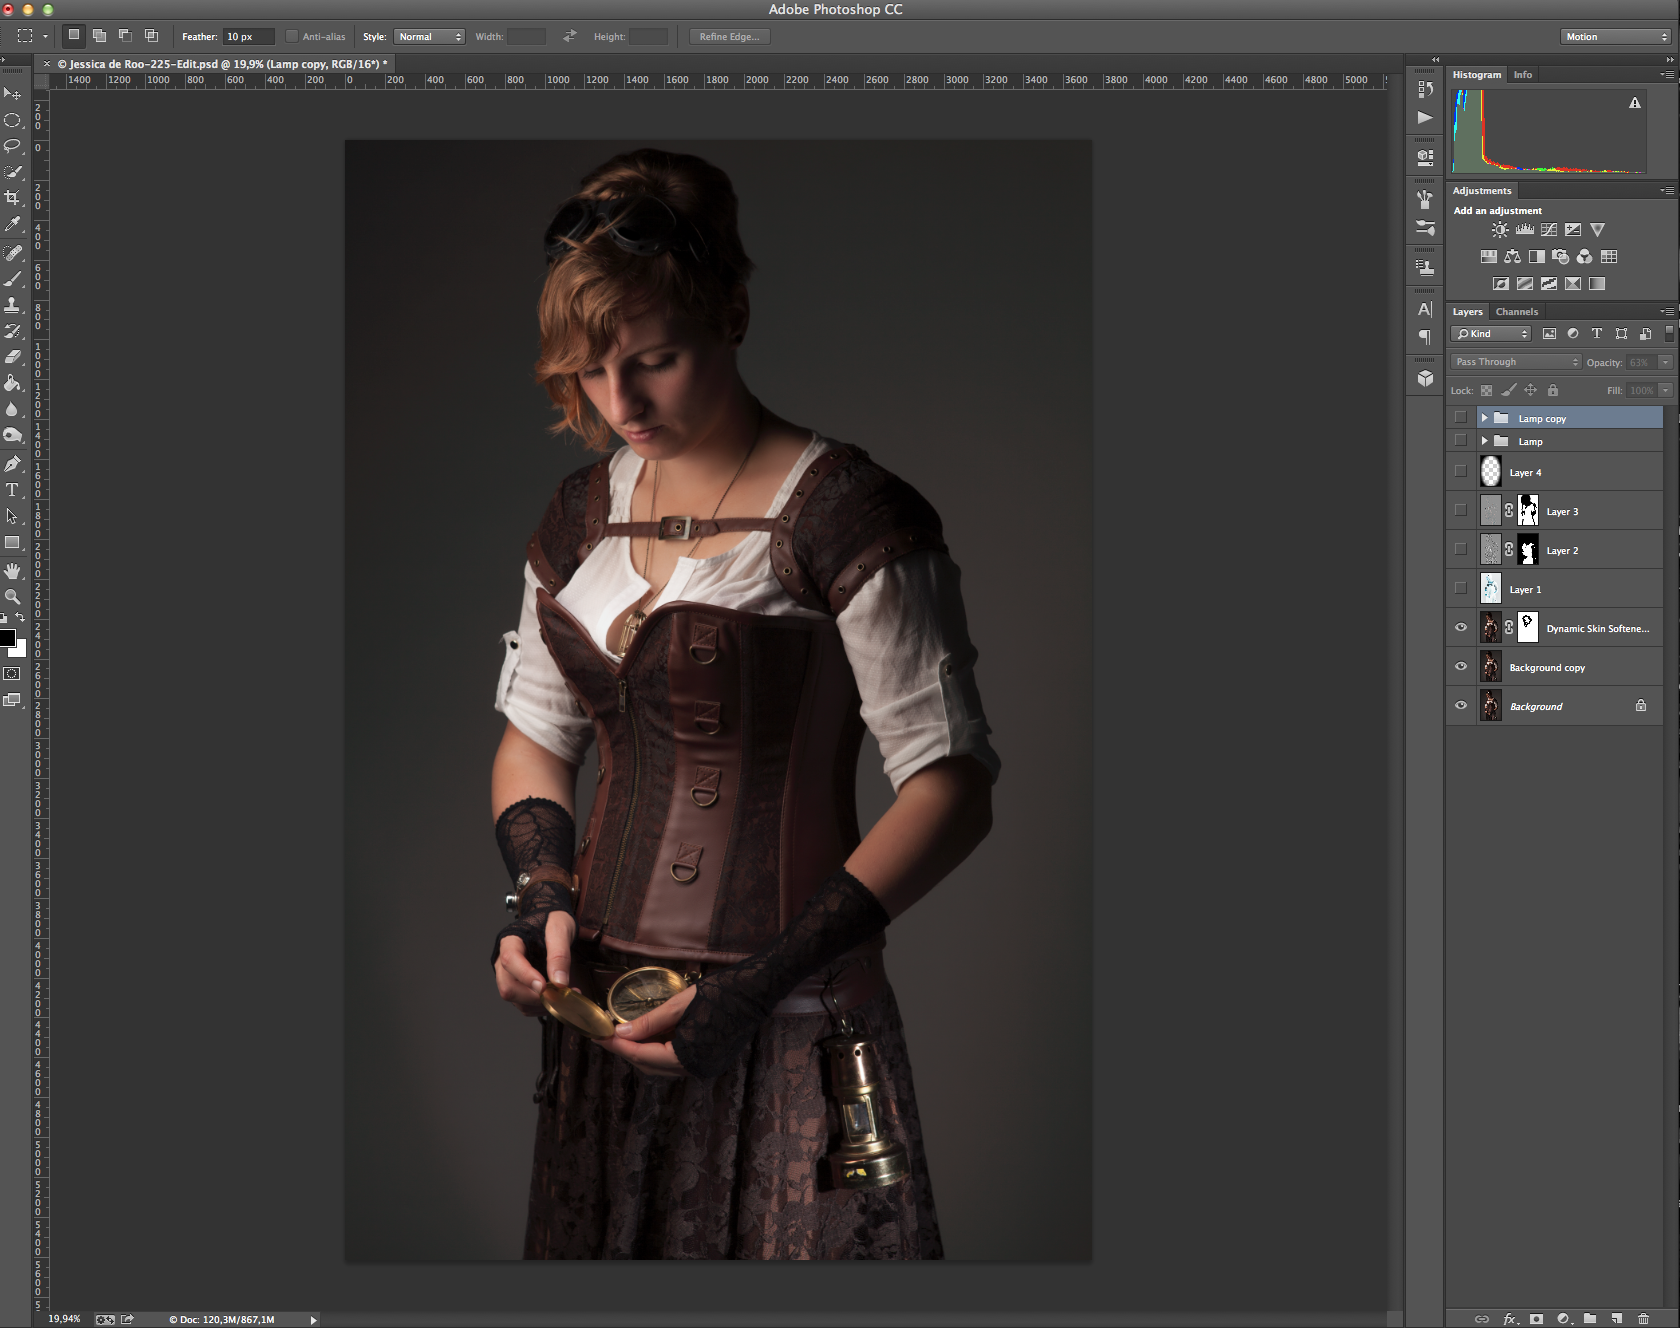
Stap 2: Met Nik Color Efex pro heb ik Dynamic skin softening gebruikt om de huid te verzachten

Stap 3: Ik heb het fijne contrast verhoogd met een laag en extra verscherping toegevoegd met een High Pass filter
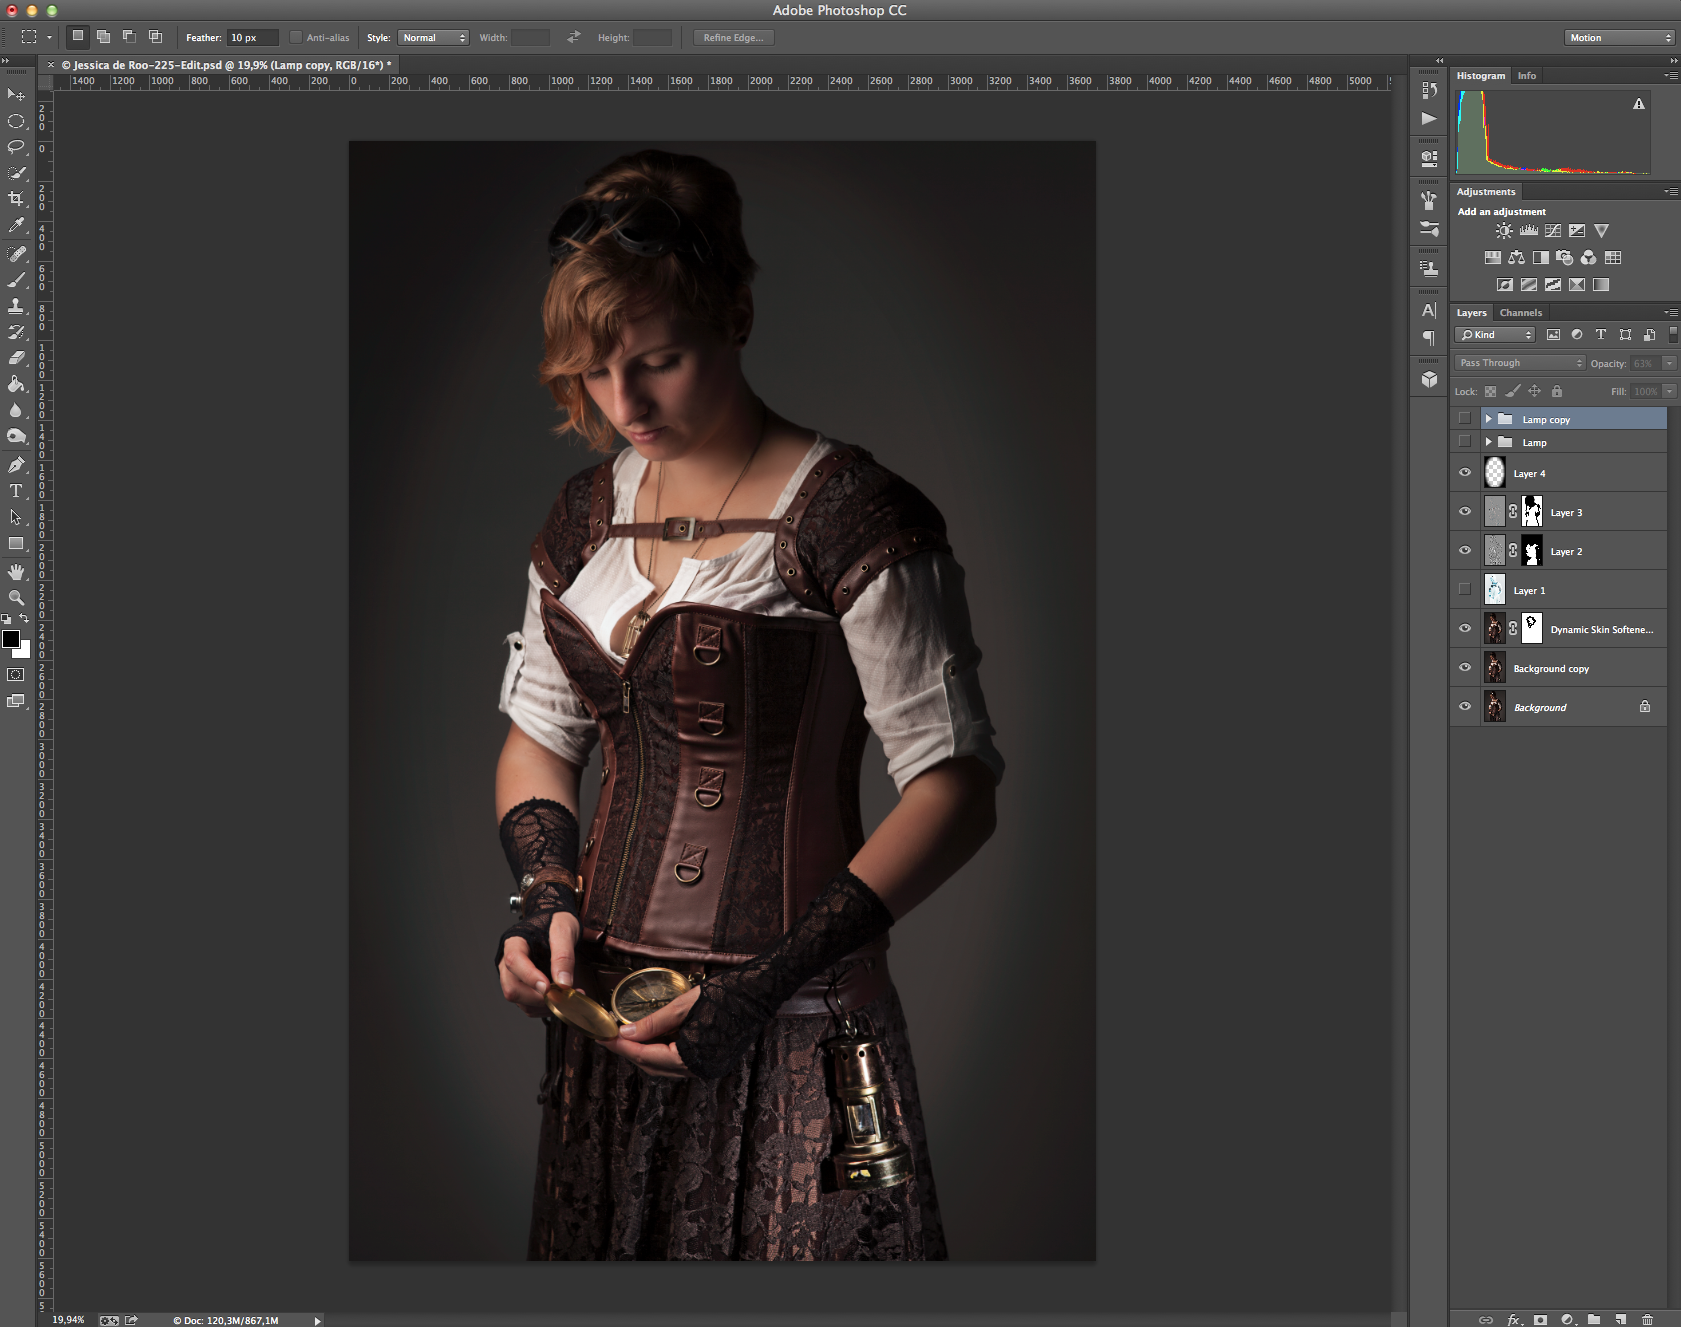
Stap 4: Voor een wat donkerdere look en om je ook meer naar het onderwerp te brengen heb ik een vignette gemaakt
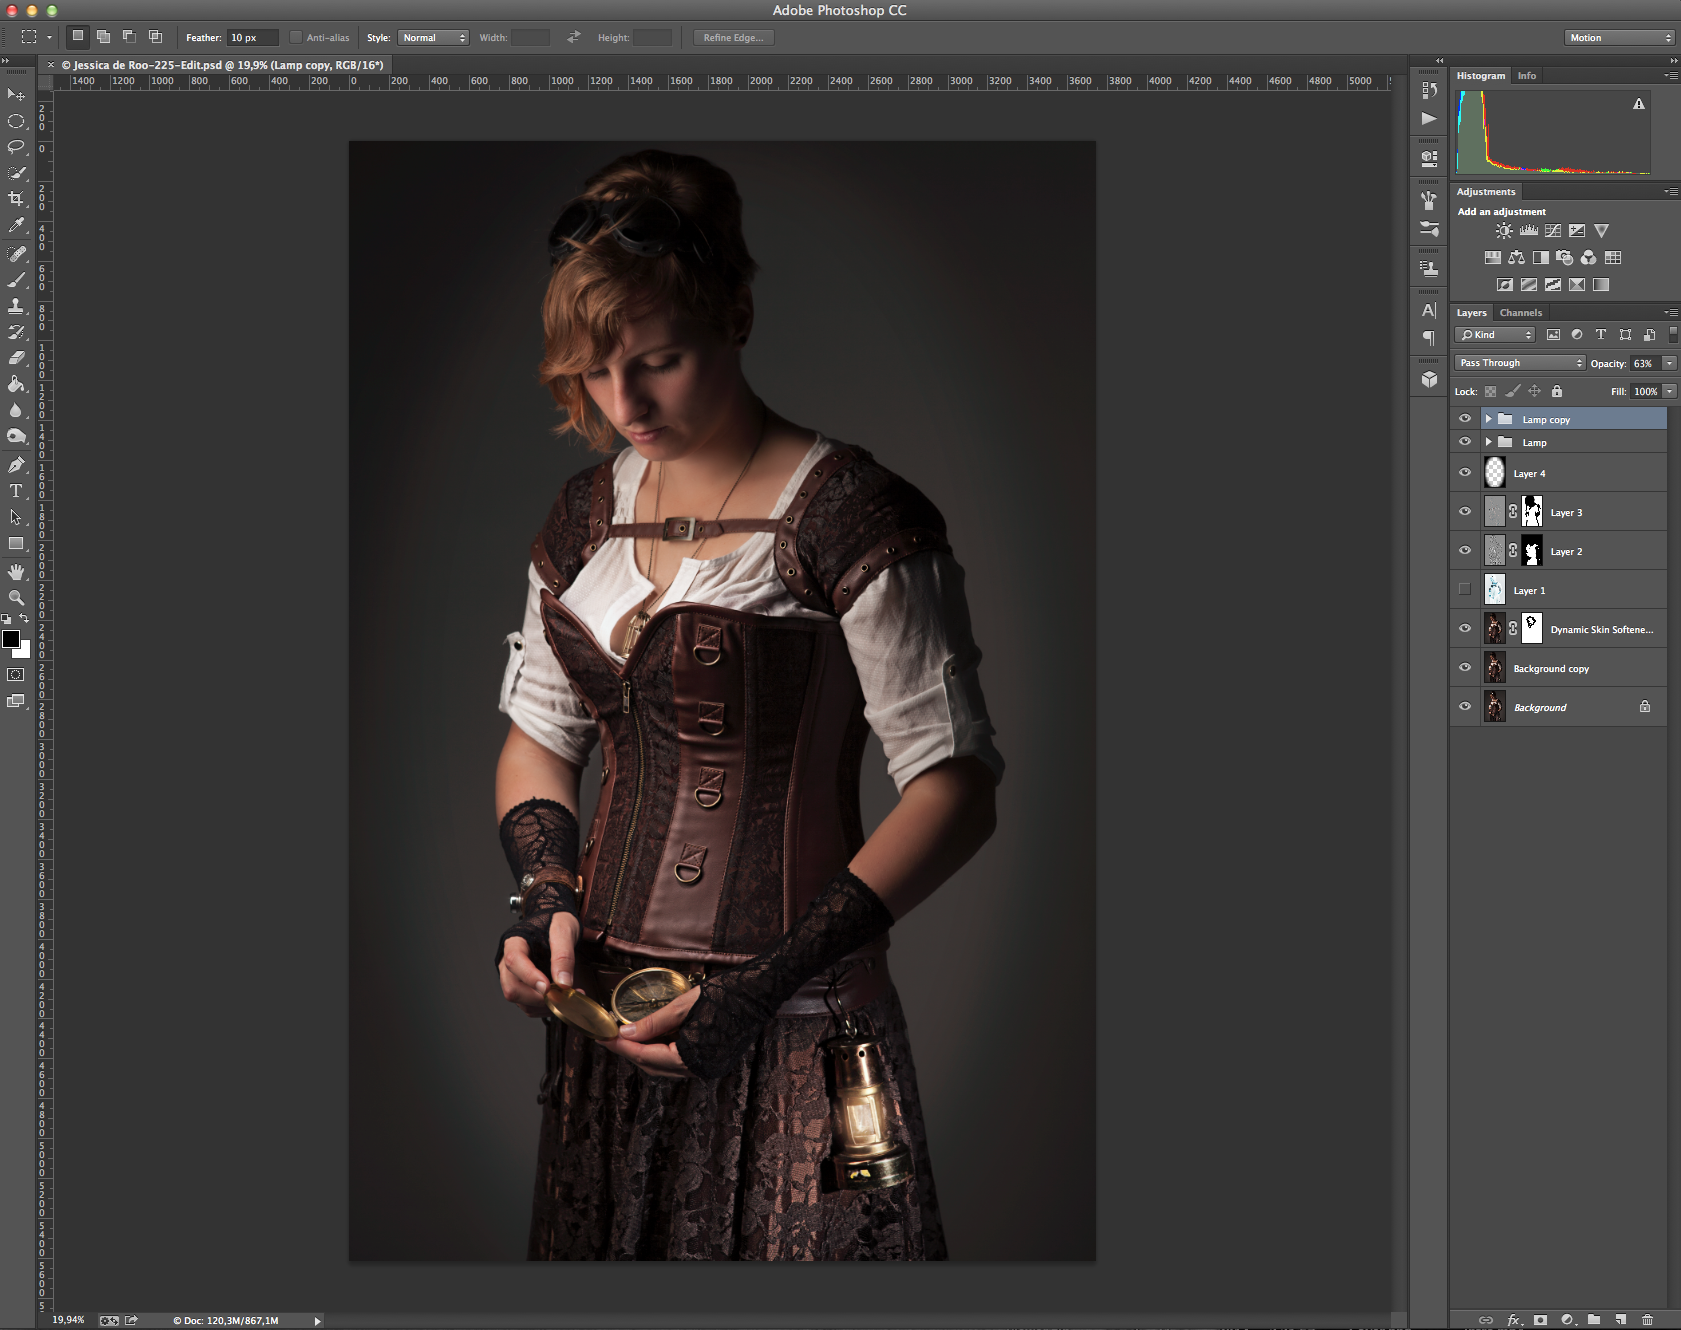
Stap 5: Als laatste finish wilde ik dat het lampje en meer glowing/brandend effect had, Dit heb ik aangebracht met curves. 1 laag voor het licht en de andere voor de kleur.
Overig gebruikte gear en instellingen
Camera: Canon 5D Mark II Lens: Canon 24-70 2.8
Instelling: Iso: 100 Diafragma: f8 Sluitertijd: 1/125 Witbalans: Flash
Trigger: Elinchrom Skyport Lichtmeter: Gossen Digisky Achtergrond: Standaard witte rol achtergrondpapier 2.75 meter breed

Lightroom Workflow

Voor iedereen die wil weten hoe ik mijn nabewerking doe, hierbij een video over mijn Lightroom workflow. Voor 80% van mijn werk gebruik ik Lightroom of Apple Aperture, een beetje afhankelijk van de Job. Lightroom is iets krachtiger dan Aperture, voor de meer commerciële en grotere opdrachten gebruik ik dan ook Lightroom. Heeft meeste van mijn editing probeer ik ook in Lightroom te doen. De meer specifieke dingen als echt retoucheren of samen voegen van foto's doe ik in Photoshop. Onthoud tevens, je kan met Lightroom en Photoshop een goede foto geweldig maken, maar nooit een slechte goed maken! Voor iedereen die meer wil leren over Lightroom en Photoshop, kijk bij mijn Workshops!